While not the most challenging car repair project you could tackle on your own, there are a couple of things you need to be aware of before replacing sensors on xenon lights.
Xenon lights are some of the most popular (and powerful) headlights on the market today. High Intensity Discharge (HID) lights, xenons are filled with gas instead of a heated filament like halogen lights. Many of these headlights are designed to self adjust in concert with your vehicles suspension, a setting handled by your xenon light sensor.
If that sensor fails for one reason or another, though, your lights are going to come out of alignment and may not work correctly at all.
That’s why we put together this detailed guide.
What is a Xenon Light Sensor?
The headlight sensor on a pair of xenon lights is designed to keep your low and high beams aligned with one another, but also to keep your headlight height dovetailed in with your suspension system, too.
Each xenon headlight has an electronically activated sensor system that makes sure your low beam light cone is pointed in the same space as your high beams. This allows for a smooth transition between low and high beams, guaranteeing that the same general area of the road is illuminated no matter what.
On top of that, though, these sensors are linked to the suspension of your vehicle. As you ride down the road your suspension buffers you from bumps and humps, giving you a lot more control over your vehicle while also making for a smoother ride.
When working correctly, these sensors adjust the height of your headlights in connection with your suspension. As your suspension moves, the headlights move to maintain perfect alignment. This keeps the road well lit even if you’re driving over a roller coaster of pavement.
Why Do Xenon Light Sensors Fail?
If the xenon headlight sensor is failing, though, you’re not only going to be dealing with a misalignment of your low and high beams, but you might also be dealing with unsafe driving conditions.
When the sensor stops reacting to your suspension, but instead keeps the lights stationary (or leaves them “frozen” in place) your lights will be a lot less effective and a lot less reliable.
Your lights may not even work correctly at all, in more extreme circumstances.
Buy why do these sensors fail?
Loose Connection
One of the most common reasons xenon headlight sensors fail is simply because of a loose electrical connection.
You can imagine that something that moves every time your car hits a bump or a hump in the road is going to see a lot of action. It’s not at all unreasonable to assume that over a couple of years of self-adjusting nonstop connections can become loose.
When that happens the sensor stops getting a consistent electrical signal and fails to work the way it should.
Faulty Wiring
Faulty wiring can be a major problem that causes this issue as well.
Wiring harness that become loose can start to overheat or breakdown. Friction on the wires themselves can lead to bare spots and shorts as well. You may even be dealing with a blown fuse situation (but that’s pretty quick and easy to diagnose and repair).
Blown Sensor
Like everything else on your vehicle, xenon light sensors are man-made parts and are prone to wear and tear.
As the years go on these parts are going to be subjected to all kinds of conditions, and one day they’ll simply fail. Parts like these are relatively affordable and you should expect to have to replace them every 4-5 years on average.
Broken Sensor Arm
Finally, while the symptoms of a broken xenon light sensor are identical, you may not be dealing with a sensor issue at all – but instead trouble with the arm that the sensor is connected to.
Any breakdown in the arm responsible for articulating the headlights according to the feedback provided by the sensor will look like a sensor problem. Sometimes, though, you just need to replace the arm itself.
Do that and you’ll be good to go!
Replacing Sensor Xenon Light
If you are dealing with a xenon sensor problem, though, you can (usually) tackle the problem all on your own – without having a lot of mechanical experience under your belt or any specialized tools.
ALWAYS Wear Gloves!
First things first, you need to be sure that you never handle xenon headlights with your bare hands.
Touching the bulbs even just a little bit with bare skin can leave behind some of your natural oils. Because these bulbs use xenon gas and are superheated the oil can start to bubble and burn, destroying your headlights in the process.
Use mechanics gloves, or good latex gloves at an absolute bare minimum.
Prepare Your Work Surface
Next, it’s not a bad idea to clean and prepare your workspace ahead of time.
Get all the tools you’ll need before you start the project. This will be vehicle specific, but you’re likely going to need a couple of different wrenches and sockets to make this work. Long handled screw drivers, lubricants, and paper towels should be on hand, too.
It’s not a bad idea to put a mat or at least a piece of cardboard under the area you’re working, either. This’ll help to catch any hardware that falls off or drops during the project. It’ll be a lot easier to find this way.
A headlamp is a must have for all auto projects!
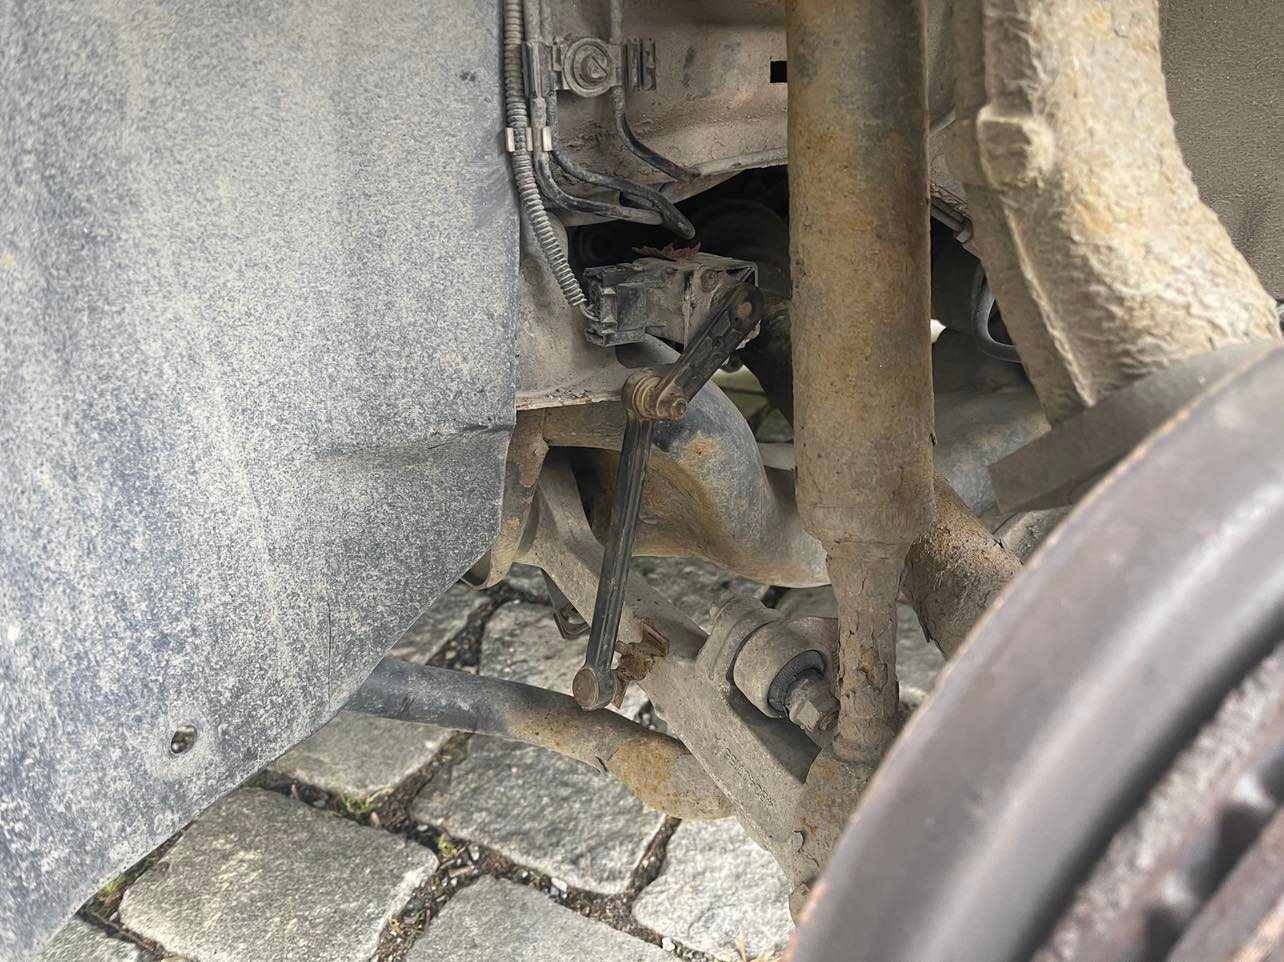
Inspect (and Replace, If Necessary) the Connecting Rod First
The first thing you’ll want to do is find the connecting rod that handles the articulation of your headlights. If this part is compromised or is frozen in place, it’s the first thing you’ll want to remove and replace.
Test your headlights after this has been swapped out to see if the problem is resolved. If not, move on to the next steps.
Swap Out Your Sensor
Your owner’s manual (and a search on Google, too) will show you exactly where your xenon sensor is in relation to your connecting rod.
Find the sensors and uncouple them from the wiring harness that are attached to. This is usually just a single clip that you can manipulate with your fingers, but sometimes you’ll need a flathead screwdriver to pry things open a bit.
Next, find where the sensor is bolted to your vehicle. You’ll want to loosen that bolt completely, probably with a socket wrench. If it’s stiff, use a little bit of penetrating oil as a lubricant. Let the oil setup for a couple of minutes and then get back to it. The bolt should come right off.
After the part has been removed simply reverse the process. Bolt the new sensor in place, carefully tightening – but not over tightening – the hardware. Attach the wiring harness back together and you should be rocking and roll.
Conduct a Quick Function Test
A quick function test can confirm that everything is good to go before you cleanup your workspace.
Have someone turn your headlights on while you are under the car. You’ll be able to see right away if the system works to first come online at all, and then if it works to align your headlights to your suspension.
Now you’re off and running!
Closing Thoughts
Replacing the xenon light sensor in your vehicle isn’t the toughest bit of upkeep you can do on your car, but it is a critical component to keep your car working the way it should.
No one wants to find themselves driving around at dark (or in a storm) with headlights that are unresponsive or unreliable.
Use the steps we shared above to resolve this problem and you won’t have anything to worry about!